Welcome to iTop Easy Desktop
iTop Easy Desktop is an incredibly powerful and user-friendly desktop manager that revolutionizes your workspace, transforming it into a well-organized, clutter-free haven. Say farewell to the chaos of scattered icons and files! With iTop Easy Desktop, you have the freedom to arrange your desktop exactly as you like and create a stunning and functional environment that reflects your personal style.
What truly sets iTop Easy Desktop apart from ordinary desktop managers is its exceptional ability to elevate your desktop experience with breathtaking wallpapers and customizable boxes. Plus, with the integrated AI Assistant, your productivity journey becomes smoother and more efficient than ever. Packed with a host of practical features like Private Box, Search, ChatAI, and Widgets, iTop Easy Desktop addresses your needs and empowers you to work with greater efficiency. Experience the convenience and creativity at your fingertips—make your desktop not just a workspace, but an inspiring space!
The following guide will help you get familiar with iTop Easy Desktop quickly.
System Requirements
• Windows 10 and above (64-bit system only)
• Windows 7 and Windows 8 supported by iTop Easy Desktop v3.
Download & Installation
1) Click here to download the latest version of iTop Easy Desktop. For Windows 7 and Windows 8, click here to download iTop Easy Desktop v3.
2) Double-click the downloaded itop-easy-desktop-setup.exe to start the installation. Then follow the on-screen instructions to complete the installation.
Uninstall
You can uninstall iTop Easy Desktop by following Uninstall Instructions.
Update
You can update iTop Easy Desktop by following the instructions below:
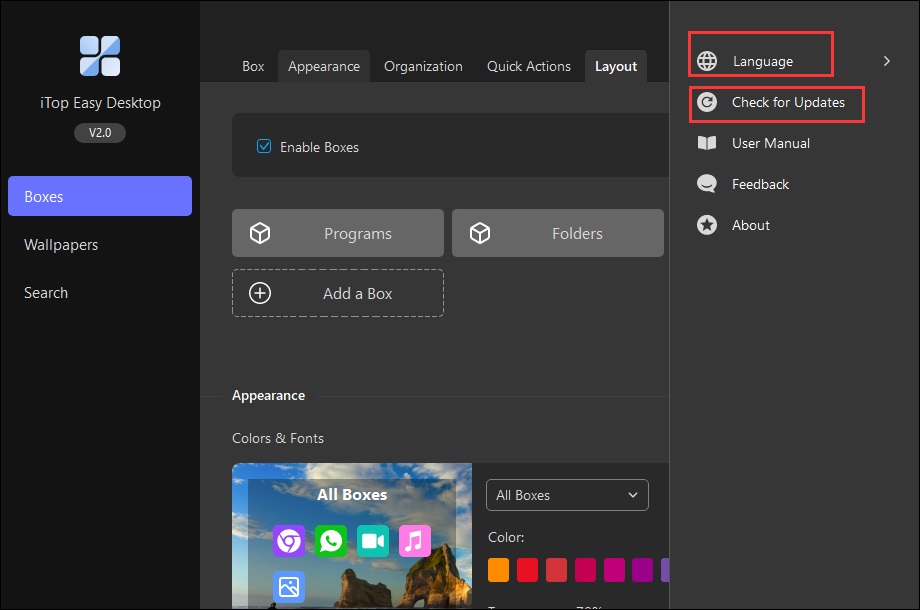
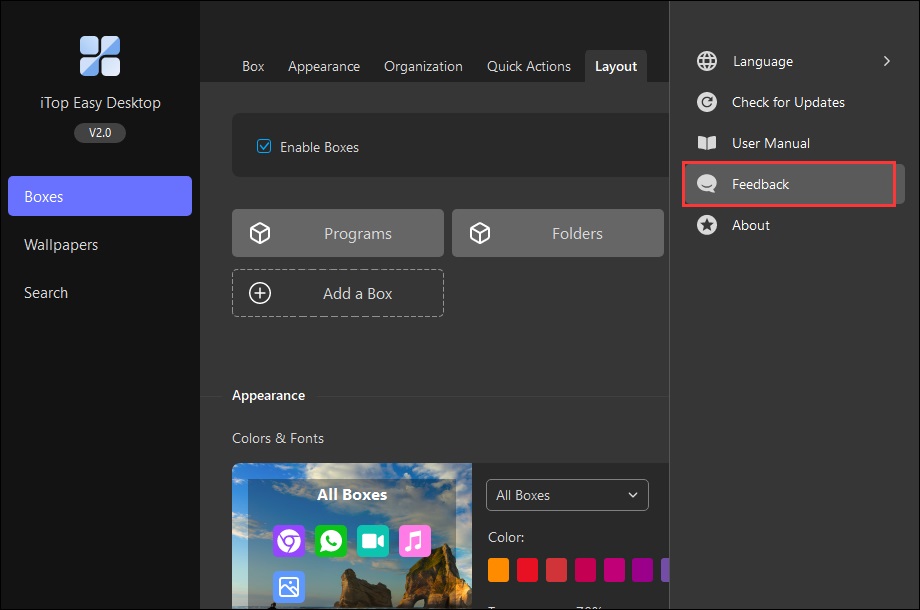
Open the main window of iTop Easy Desktop > click the Options icon at the top right > click Check for Updates. Under Options, you can also change the Language of the program interface.
Sign Up/Log In
If you don't have an iTop account yet, follow these steps to sign up:
Click the User Profile icon at the bottom left corner > click the Sign up text link on the pop-up window > follow the on-screen prompts to create your account
![]()


If you already have an iTop account, you can just click the User Profile icon at the bottom left corner and click the Log In text link on the pop-up window to log in. Besides, you can also log in with your Google account or Microsoft account.

Activation
Basically, the iTop account you used to place the order will be upgraded to a Pro account automatically after the purchase is finished. If not, you can visit here for step-by-step activation instructions.
Forgot/Change Password
If you forget your password, please launch iTop Easy Desktop > click the User Profile icon at the bottom left corner > click Forgot password? > follow the on-screen prompts to reset your password.

If you want to change your password, please click the User Profile icon at the bottom left corner > select Change Password > fill in the form in the opened browser.

Get Started
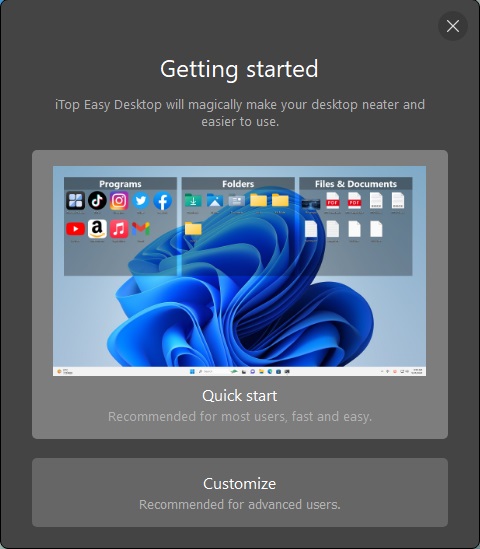
Once iTop Easy Desktop is installed, you can see a welcome screen providing a choice to start iTop Easy Desktop with Quick Start or Customize.
Quick Start means all the items on the desktop will be automatically and intelligently sorted out into different boxes according to iTop Easy Desktop preset rules.
Customize means all the items on the desktop will be automatically arranged and aligned to grid. Then you can create boxes and put the desktop items into different boxes according to your needs.
No matter which method you choose to start iTop Easy Desktop, you will get the main interface as below. In addition to the User Profile icon at the bottom for viewing your account information, the navigation bar is divided into five sections: Boxes, Wallpapers, Personalization, Widgets, and AI Assistant, which are the main features of iTop Easy Desktop. Let's get familiar with them one by one.
Boxes
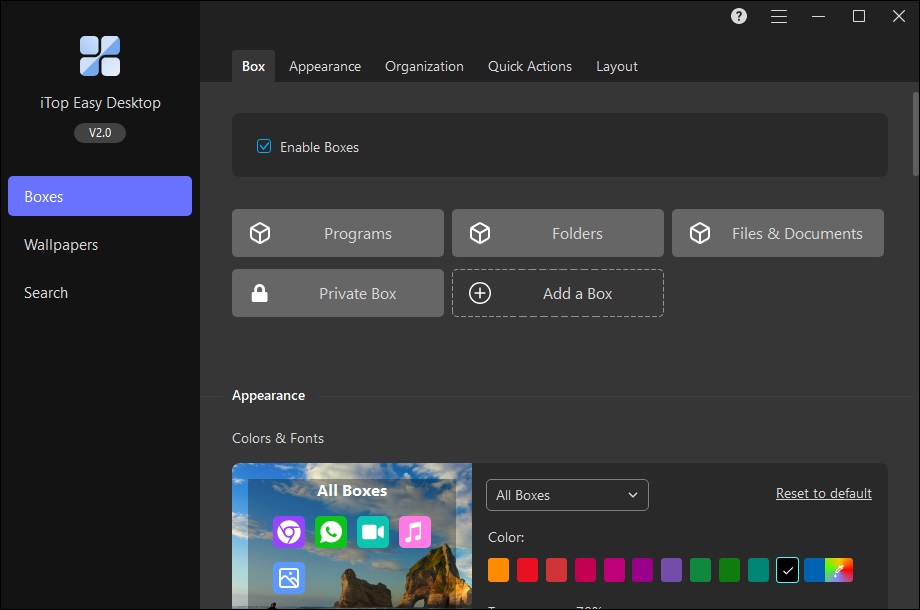
In the Boxes panel, there are six tabs: Box, Appearance, Organization, Quick Actions, Layout, and Snapshot.
Enable Boxes
Under the Box tab, you can decide whether to assign your desktop icons into those boxes or not by toggling on/off the switch for "Enable Boxes".
Note: For free accounts, only 3 boxes are available.

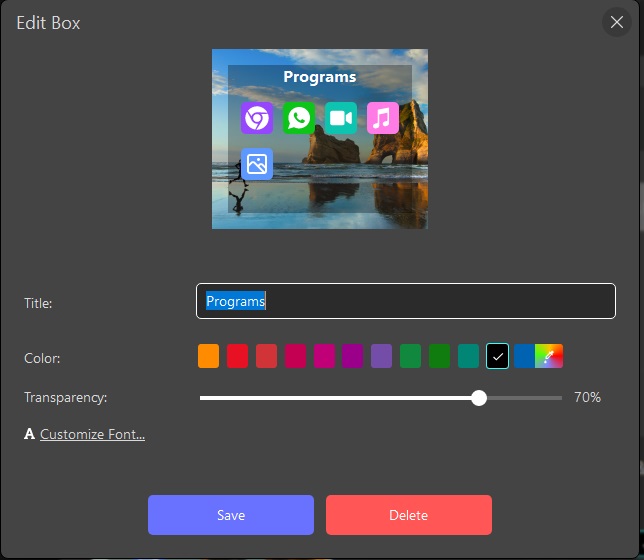
By clicking each box, you can edit each box separately, including renaming it and changing its background color.
Create a Box
There are four ways to create a box.
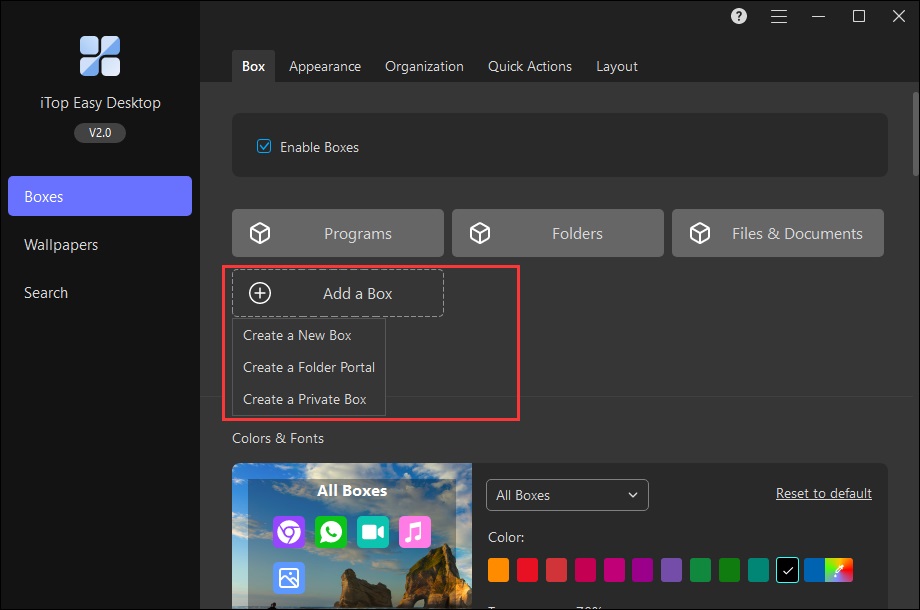
1. Click the ![]() icon to create a new box directly in the Boxes panel. Additionally, you can create a Folder Portal or Private Box in this way.
icon to create a new box directly in the Boxes panel. Additionally, you can create a Folder Portal or Private Box in this way.
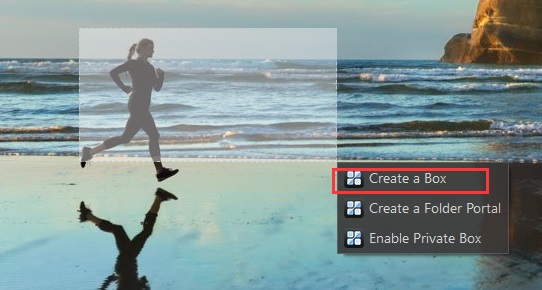
2. Left-click your mouse and hold to draw a rectangle on the desktop. Then you will have the option Create a Box next to this rectangle.
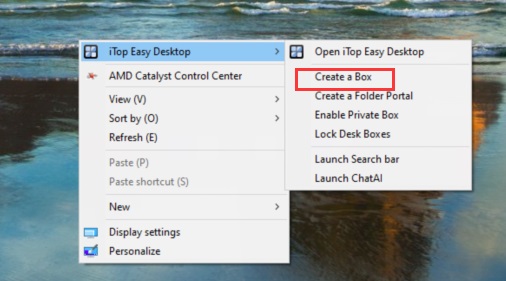
3. Right-click the mouse on any blank area of your desktop, then choose iTop Easy Desktop in the context menu and select Create a Box.
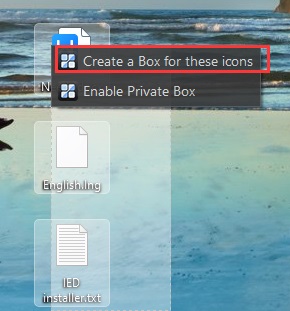
4. Select the items you want to put into a box, right-click the mouse, and select Create a Box for these icons.
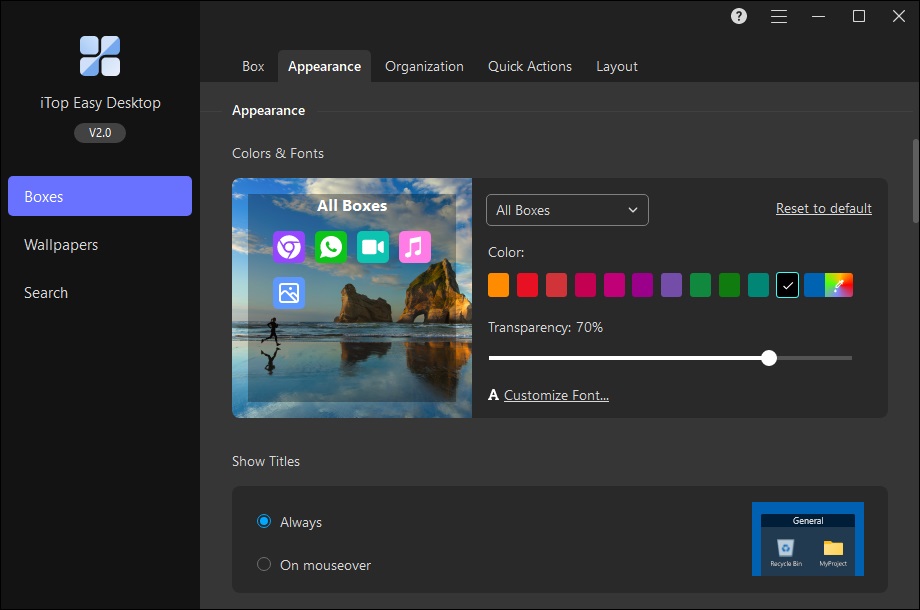
Under Appearance, you can customize boxes' appearence, such as choosing whether to show titles, coloring the box, and changing the fonts of the boxes' titles.
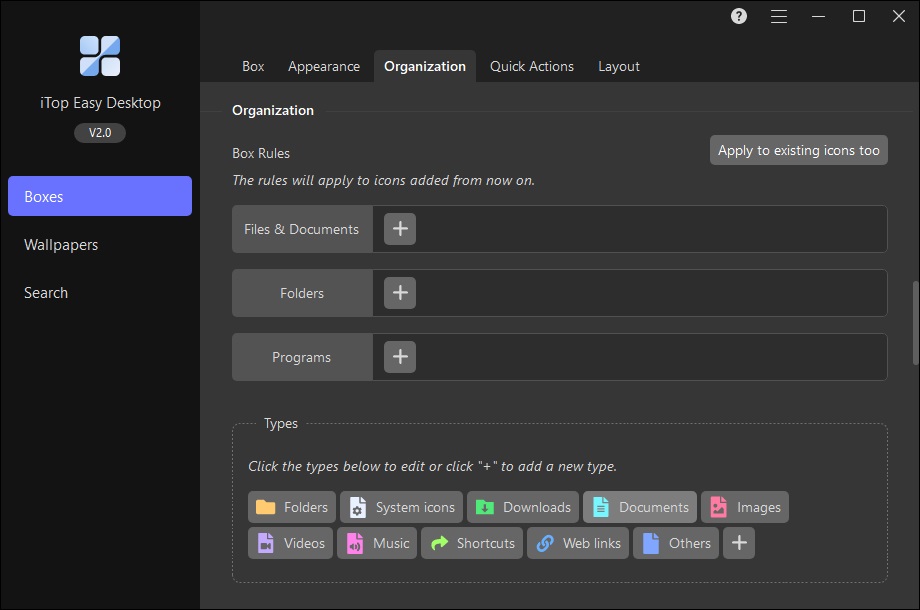
Under Organization, you can create your own rules for each box, deciding how to group your desktop items.
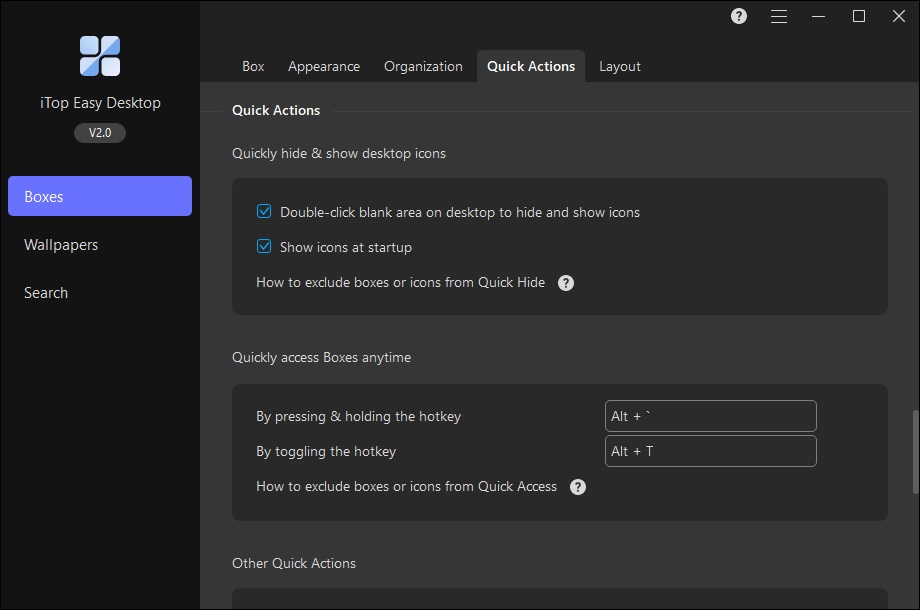
Under Quick Actions, there are some quick actions to help you get a neat desktop, access boxes, and choose to open items by single click or double click, etc.
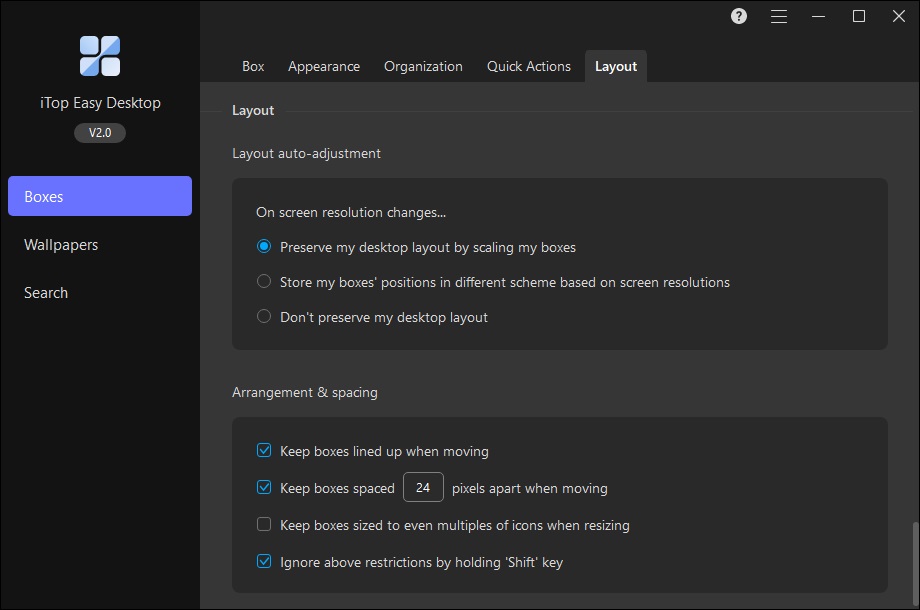
Under Layout, you can decide the boxes' layout when changes are made, such as when the resolution is changed.
Under Snapshot, you can back up your current desktop and restore your previous desktop.

Tab Mode
For a tidier desktop, drag boxes to merge them as tabs, or split them apart anytime you want.

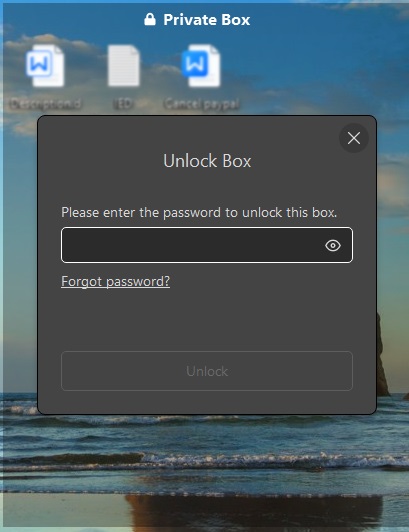
Private Box
Private Box needs to be mentioned especially because it offers password protection for your important files and folders. Once locked, the password is required for any access. Private Box is only available for Pro accounts.
To create a Private Box, you can go to the Boxes tab > click the ![]() icon > select Create a Private Box, or right-click the blank space on your desktop > select iTop Easy Desktop > select Enable Private Box. During setup, you'll be prompted to set a password and provide an email address for password recovery. Then just move the files or folders you want to protect into the box.
icon > select Create a Private Box, or right-click the blank space on your desktop > select iTop Easy Desktop > select Enable Private Box. During setup, you'll be prompted to set a password and provide an email address for password recovery. Then just move the files or folders you want to protect into the box.
Note:
· Only one private box can be created per account. Once created, the option Create a Private Box won't be displayed.
· On some devices, you may be asked to reboot your computer to enable Private Box.
· Please remember the password and associated email address you set for Private Box.
Wallpapers
Wallpapers in iTop Easy Desktop can help you unique your desktop. It provides various vivid wallpapers, including Live Wallpapers, and Static Wallpapers. Moreover, you can add, create and publish your created wallpapers in My Wallpapers. Free accounts only have access to free wallpapers.
Note: All wallpapers are uploaded by enthusiastic users. If you believe there is an infringement, please contact our support team directly. We will remove the wallpaper immediately from iTop Easy Desktop.
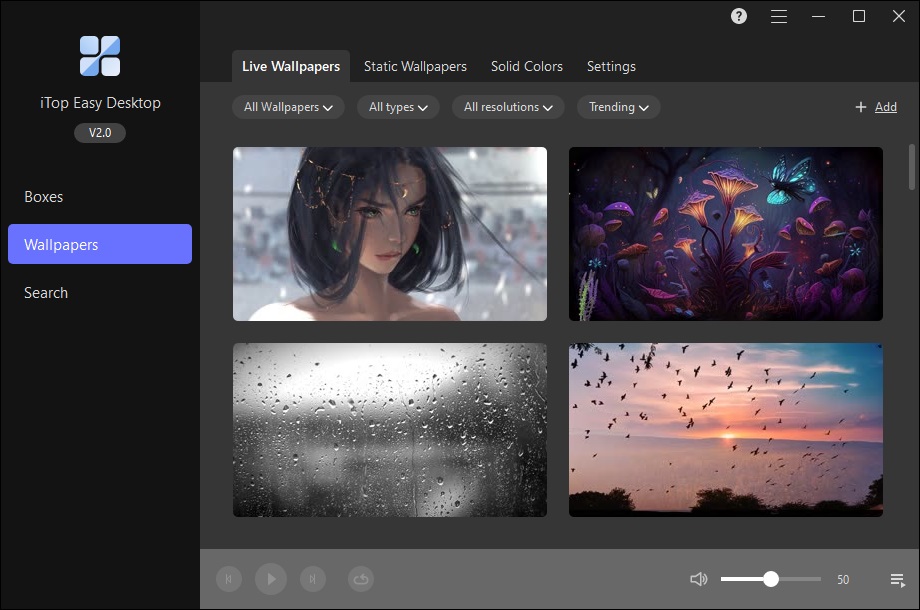
Apply Wallpapers
Whether it is a live wallpaper or a static wallpaper, its top-left corner displays the resolution, download count, and favorite count. You may select wallpaper types by category, access popular wallpapers through quick selection, or search for specific wallpapers freely.
In the Live Wallpaper section, scroll your mouse to view available live wallpapers. Click the Preview icon to check a wallpaper out, or hit the Play icon to set it as your desktop background. Meanwhile, the three-dot icon in each one's bottom-right corner provides the options: Add to My Favorites, Add to Playlist, View Details, Copy ID, and Delete (available only for downloaded wallpapers). Once you add live wallpapers to Playlist, they'll play automatically according to your preset mode — Single Loop, Shuffle, or Order. You can find Playlist and its settings at the bottom of My Wallpapers.

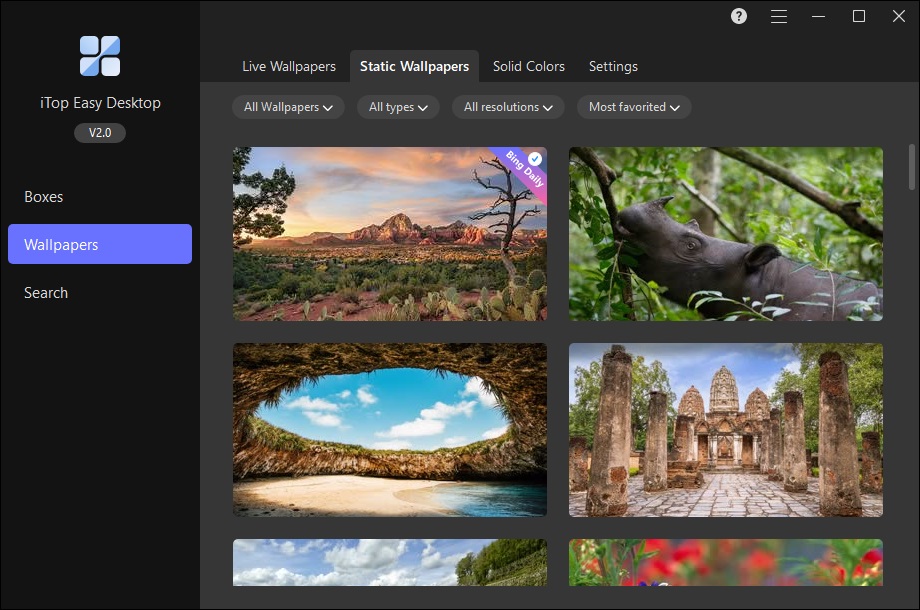
In the Static Wallpaper section, scroll your mouse to view available static wallpapers. Click the Apply to background icon to set it as your desktop background. Meanwhile, the three-dot icon in each one's bottom-right corner provides the options: Add to My Favorites, Add to Lock Screen, View Details, Copy ID, and Delete (if the wallpaper has been downloaded). Besides setting the static wallpaper as your desktop background, you can also apply it as your lock screen.
Create Wallpapers
In the Wallpapers panel, the top-right Create Wallpaper icon lets you dive right into designing wallpapers that match your style.

Clicking the Create Wallpaper icon will launch the creator window, enabling users to initiate wallpaper design. To create a new wallpaper, you can either drag and drop an image or video file into the window, or use the browse function to select a target file.

Wallpaper Creator options include Particle Effects and Filters; additionally, Mouse Effects are available to modify the display and interaction mode of the mouse cursor.
Upon completion of your wallpaper design, you can click "Apply now" to apply the newly created wallpaper to your desktop, or select "Publish" to share it with a wider audience of users. Alternatively, you can save the wallpaper to My Wallpapers to retrieve and use it later.

My Wallpapers
The My Wallpapers section allows you to access and manage all your wallpapers (both live wallpapers and static wallpapers), covering downloaded, favorited, published, self-created, and local wallpapers. You'll also find the controller for the Live Wallpaper Playlist right at the bottom of this section.

Clicking the  icon on the right side of the My Wallpapers panel will launch the wallpaper settings window. Here you can set whether live wallpapers play automatically, adjust the play mode, tweak play settings, and more. Additionally, you can pick which screen to display wallpapers on and choose where to save your wallpapers.

Personalization
Personalization lets you create a unique and stylish desktop by configuring Themes, Taskbar, Start Menu, Desktop Icons, and Mouse. You can select a dedicated theme for your device, customize the taskbar layout, modify the Start Menu style, set your preferred desktop icon display mode, and adjust the mouse appearance and behavior. Only Pro accounts have access to Personalization.
Note: Fancy Taskbar in iTop Easy Desktop V3 is now integrated into the Taskbar section of Personalization.


![]()

Widgets
iTop Easy Desktop is equipped with 7 widgets, namely Schedule, iNotes, Clock, Weather, Quick Tools, iPomodoro, and Chat AI. To display and activate each widget on your desktop, you need to toggle its corresponding switch individually.

Schedule can remind you of important events. You can click the  icon at the bottom right of Schedule to create a reminder. Clicking the
 ![]() icon at the top right of Schedule, you can add your Google account or Microsoft account and sync the data with your Google Calendar or Windows Calendar.
icon at the top right of Schedule, you can add your Google account or Microsoft account and sync the data with your Google Calendar or Windows Calendar.

iNotes can help you take notes for important things. You can pin it up front or unpin it from front by clicking the pin icon on each note's top right. More quick actions are available if you click the three vertical dots icon.

Click Manage iNotes in the options menu to launch a management window, where you can effortlessly browse your notes and search for past content.

There are two styles for Clock to display on your desktop: Dial Clock and Digital Clock. You can change the clock's size and settings by right-clicking on anywhere of the clock.

Weather can help you keep updated on weather on your desktop. You can also add a new location to get its weather information on your desktop.

Quick Tools is a special shortcut panel — you can instantly launch core features of iTop Easy Desktop right from your desktop, such as Screenshot.

iPomodoro can be enabled directly on your desktop to help you stay focused on any task, big or small.

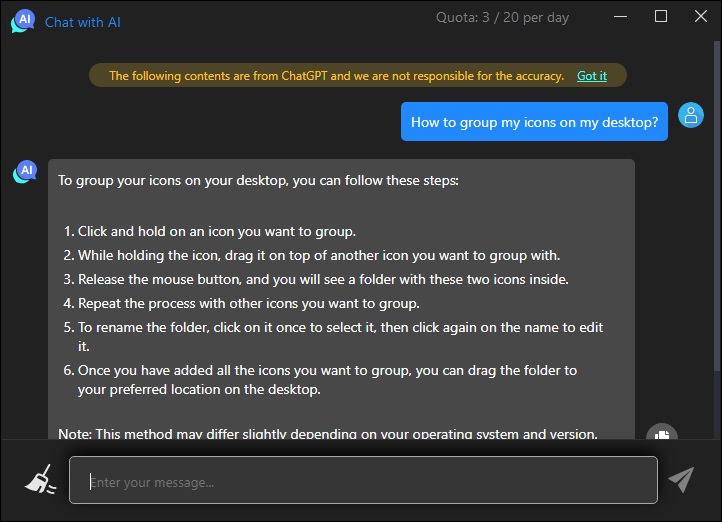
Chat AI can be enabled directly on your desktop to instantly launch the smart tools — including AI chat, AI writing, AI translate, and AI summary, letting you access these handy AI features right from your desktop whenever you need assistance.

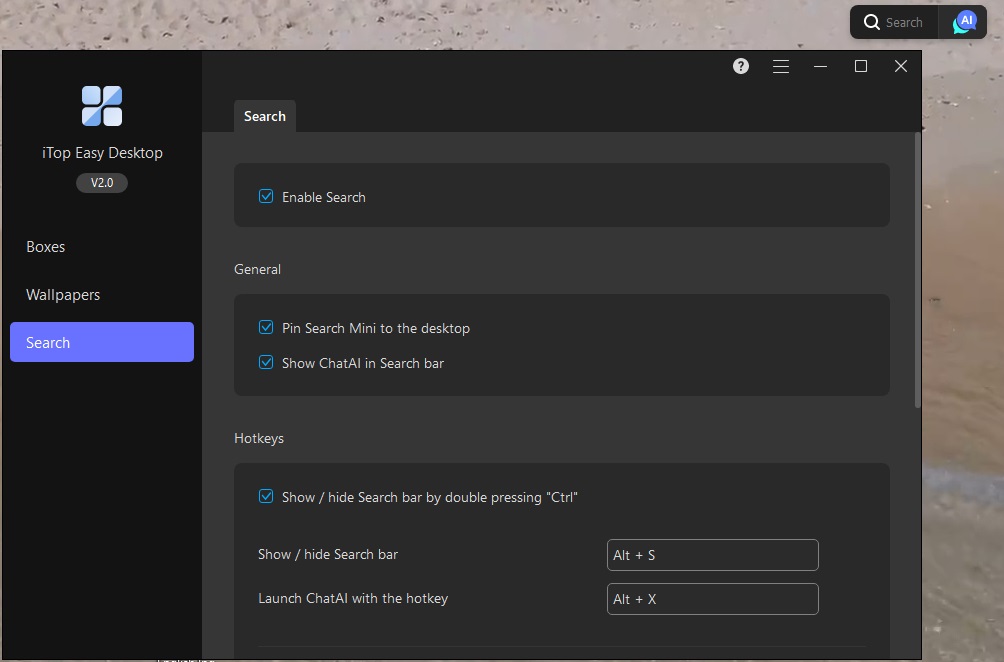
AI Assistant
AI Assistant is your one-stop hub for 3 game-changing desktop tools: ChatAI, Search, and Screenshot. Its intuitive settings panel lets you turn these powerful features on or off easily. Without switching between multiple apps, you can chat with AI, look up info, and capture screens easily.
Configure ChatAI to launch automatically when Windows starts, enable direct desktop access, and set a custom hotkey for it in the ChatAI panel.
You can set Search to start with Windows automatically, and even set up handy hotkeys for it right in the Search panel.
You can set handy hotkeys for the Screenshot feature to effortlessly capture the full screen, current window, or scrolling windows—all configured right in the Screenshot panel.

Technical Support
Feedback
We value all feedback from our users. To submit your feedback, please open the main window of iTop Easy Desktop > click the Options icon at the top right > click Feedback.
Thank You
Thanks to all iTop Easy Desktop users who motivated us to make this product and make it better and better.
Thanks to the following volunteer translators who greatly help improve iTop Easy Desktop and introduce it to more users worldwide:
MFM Dawdeh, Lyuben Panchev, NQH, alan@tw, Václav Friedrich, Jørn Runge, Ernie Wong Lun Hing, Veikko Muurikainen, Frédéric Dectot, Alexander Schmidt, Stathis NToukas, Eli Ben David, Brechler Zsolt, Purwo Adi Nugroho, Claudio Birello, JaeHyung Lee, Normunds Jakuss, Staszek, Igor Ruckert, Fernando Santos, Cosmin Barna, Ilija Komljenović, dedko58, Marina Salitska, Marjan Mirai, Roberto Paiva, Sıtkı Evrenkaya, Rid Destro, Kiên Phạm Minh